Trackers
The randomizer community has developed a primary item tracker as well as some novelty ones for other game modes. This page includes information about the primary item tracker.
Primary Tracker Window
When playing the randomizer, it can be helpful to see everything you collect, what worlds you found the checks in, and your in-game stats. Everything that the tracker can display is annotated in the image below and will be referenced throughout the remainder of this page. For a complete summary of all the possible check locations in game, refer to Xtreone’s summary.
![]()
Note: The exact layout and check inclusions are subject to change from version to version.
World Labels
The image below showcases all the locations where checks may be found and their commonplace shorthand.
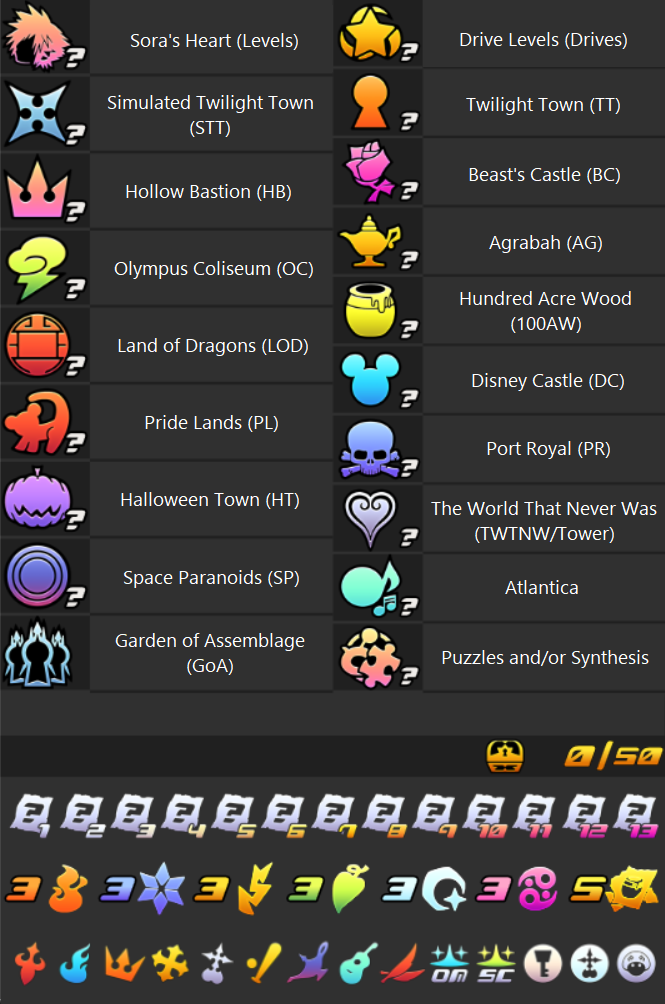
Not all locations in the tracker are always displayed. Locations are shown/hidden based on whether locations are enabled in seed settings. As an example, the image below shows a seed with only Disney worlds enabled.
![]()
Check Labels
Beneath the locations is a section containing all the trackable items. These will track to the appropriate location once collected in game.
Like locations, trackable items can be configured on a per-seed basis. Items will be shown or hidden in this section based on which item categories are considered trackable for each seed.
Instructions
The tracker can be downloaded from here if you do not have it already. Scroll to the version you want to download and download the “.exe” file only. In the event your computer tries to protect you from the file, select “More Info” and then “Run anyway.”
To use the KH2 Tracker, open the tracker by running the KhTracker.exe file. Once the tracker loads, go to
Options > Hint Loading > Load KH2 Randomizer Seed and select the appropriate randomizer seed. Alternatively, you can
drag the seed .zip file onto the tracker window to load the seed into the tracker.
Once the seed is loaded in, launch KH2. It’s good practice to confirm that the seed hash displayed in the start game
menu matches the seed hash displayed on the tracker once the seed is loaded in. After this, go to
Options > Start Auto-Tracking to begin auto-tracking (or use the Enable Auto-Connect/Reconnect option to do this
automatically). Either way, make sure the tracker confirms that the autotracking has started by checking the status icon
in the bottom-right corner of the tracker window. Either the PCSX2 or PC icon (in green) will show up when
auto-tracking. The tracker is now ready for the game to start.
Auto-Saving
Occassionaly, the tracker could crash or get accidentally closed. You can have your tracker create auto-saves in the
event that this happens. To do so, ensure that Auto-Save Tracker Progress on Tracker Exit and Auto-Save Tracker
Progress on Connection Loss are toggled ON in the Options menu.
To load one of these auto-saves, go to Options -> Load Tracker Progress and navigate to your KhTrackerAutoSaves
directory, located in the same folder as your KH2Tracker. Select the most recently saved .tsv file, and the tracker
should populate with the saved information.
Saving and Loading Seeds
In the event you want to save your randomizer progress to continue it at a later time, go to Options > Save Current
Progress and save the resulting .tsv file in a location you’ll remember. Later on, to load it back into the tracker,
go to Options > Load Tracker Progress.
Changing Image Styles
The tracker comes with many styling features. These features do not change how the tracker functions at all, but do
change the layout and visuals. Under Image Visuals you can change the world, progression, and check icon visuals to
your liking.
Using Custom Images
The tracker supports replacing the default check images with custom images. To do so, perform the following steps:
-
Download the
CustomImages.zipfrom the tracker releases. -
Extract the contents of the downloaded
CustomImages.zipfile. This will typically involve right-clicking on the zip file and selecting “Extract All” or using an unzip utility. -
Make sure the extracted folder containing the custom images is in the same directory (folder) where the tracker program is located. In simpler terms, move the extracted folder next to the tracker program file.
-
To replace a default check image with your custom image, follow these steps:
- Find the image file you want to replace in the tracker program.
- Rename your custom image file to exactly the same name as the default image file you want to replace.
- Copy the renamed custom image file.
- Paste the copied custom image file into the same directory (folder) where the tracker program and the original image file are located. This will overwrite the default image file with your custom image.
Basically, you’re giving your custom image the same exact filename as the default image so the tracker program knows to use your image instead.
Grid Tracker
General Information
The grid tracker is a tracker window that lays out several trackable items and progression events in a grid. The checks
and events will be auto-tracked once they are collected and completed, respectively. To access it, go
to Options -> Grid
Tracker.
The grid uses card settings to generate new random grids. To customize the card settings to include certain checks, open
the grid options window by going to Options -> Grid Settings in the Grid Tracker. This should pull up a window like
the one below.
![]()
To save these settings, select Save These Settings in the bottom left of the grid tracker options window. To generate
a new card with the new settings select Generate Card with These Settings in the bottom right of the grid tracker
options window.
Once you have the card settings you are satisfied with, load the seed into the tracker.
Note: The randomizer seed changes the grid layout upon loading it into the tracker, so ensure that your tracker settings are set before loading in the seed.
You can switch between the simple and game icon styles in the grid tracker. Additionally, you can change away from the
default colors in the Options -> Color Settings menu.
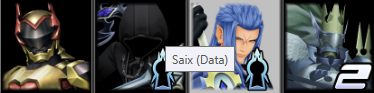
Except for settings where a cell is purposefully hidden, hovering over a cell on the grid will reveal a description of what the check represents (example shown below).
Options
Board Size
These settings customize the number of rows and cells to include in the grid. Note that these values will adjust if the number of squares on the grid exceeds the number of allowed checks.
Bingo Logic
Turning Bingo Logic ON will record when rows, columns, or diagonals are completed.
Battleship Logic
Including battleship logic will attempt to place a specified number of ships specified in the options. If Random Ship Count is OFF, then each comma separated value represents a ship size to place on the grid. If Random Ship Count is ON, then a random number of ships will be selected and can have a random size included in the comma separated values. Some examples are displayed below:
| Ship Sizes | Random Ship Count | Outcome |
|---|---|---|
| 2,3,4,5 | OFF | 4 ships, one of each size. |
| 2,3,4,5 | ON | Random number of ships, each ship being equally likely to be 2, 3, 4, or 5 in size. |
| 2,3,3,3,4,5 | OFF | 6 ships, one of each size, except for ships of size 3, of which there are three. |
| 2,3,3,3,4,5 | ON | Random number of ships, with ships of size 3 being 3 times more likely to be selected than any other size. |
Bunter Logic
This setting only applies when boss randomization is turned on.
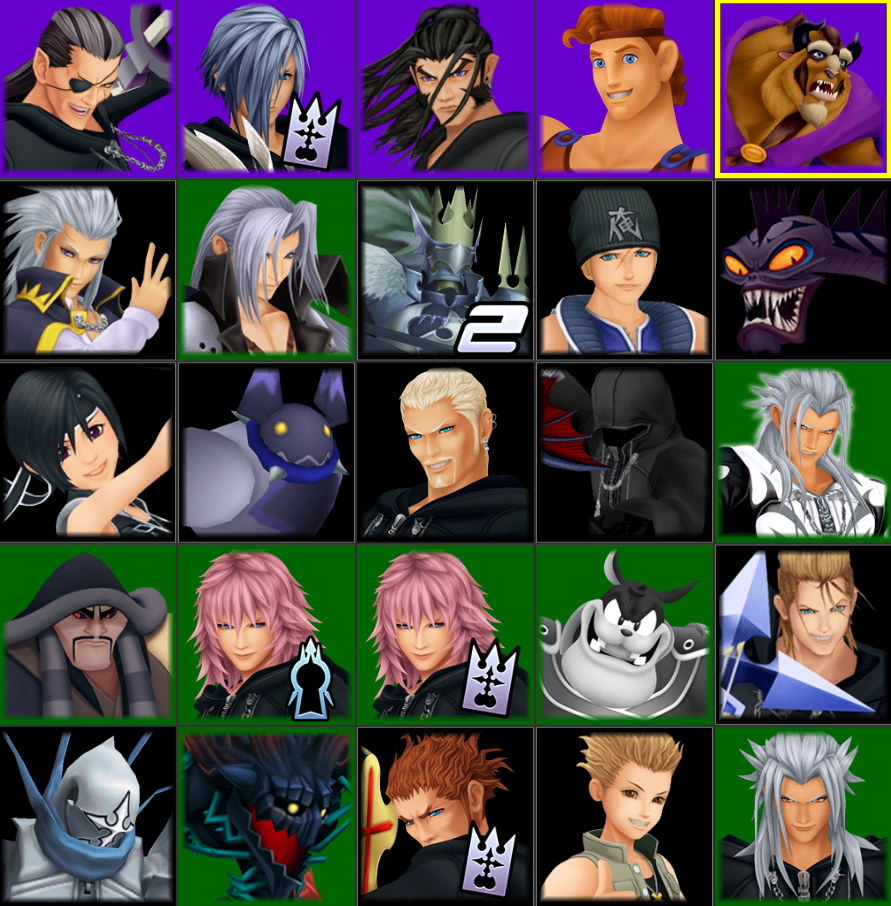
Including boss hunter (sometimes shortened to “bunter”) logic removes certain “duplicate” bosses from the card. In this format, the story/Absent Silhouette vs. Data version of the organization members as well as the 2 Pete fights are considered the same boss. If boss hunter logic is OFF, then both the Absent Silhouette and Data versions of applicable bosses are fair game for the card.
For example, suppose Absent Silhouette Marluxia replaces Absent Silhouette Vexen and Data Marluxia replaces Data Vexen. If boss hunter logic is ON, only Absent Silhouette Marluxia will be a valid icon on the card. If boss hunter logic is OFF, then both versions of Marluxia are fair game.
Fog of War Logic
Toggling this setting on will hide all the checks at the start of a seed. If ON, the number of neighboring cells that get revealed can be customized.
Game Modes
Below are examples common game mode supported by the grid tracker. This list is not exhaustive, and the grid tracker is versatile enough to support even custom win conditions.
Example: Battleships
Just like the classic board game, the grid tracker can place battleships for you to find and sink. The goal is to sink all the ships.
The tracker will inform you when you have sunk all ships. This feature is especially useful if you are playing with a random number of ships, as the “Sunk All Ships” confirms you have sunk ALL the ships and there are no additional undiscovered ships still floating around. Here is a starter battleship card setting.
You can further customize battleships by changing the grid-allowed checks, the grid size, the number of ships, the ship sizes, randomizing the number of ships, etc.
Example: Bingo
As the name implies, bingo arranges any assortment of checks you want onto the grid and if Bingo Logic is enabled in
the grid options window, the grid will actually highlight your bingos as you complete them.
Here is an initial card setting inspired by CJ_2123’s important check bingo.
You can further customize bingo by changing the grid size, allowed checks, etc.
Example: Boss + Enemy Randomized Bingo (aka “Bunter”)
A common format utilizing the grid tracker is Boss + Enemy Randomized Bingo where the objective is to get 3 bingos on a grid of 5x5 bosses, all of them shuffled into randomized arenas. If a seed with randomized bosses is loaded into the tracker, the tracker knows to track the newly randomized boss. Here is the card setting to play Zeddikus’ boss hunter bingo format.
Objective Tracker
When the win condition is based on objectives (instead of proofs or emblems), the objective tracker lists all the
objectives available and auto-tracks them upon completion. To access it, go to Options -> Objectives Tracker.
The objective window will also display how many of the available objectives must be completed to open the door to final fights as well as how many objectives you have currently completed. For example, in the image below, there are 13 available objectives, and 7 are required to open the door to final fights. As objectives are fulfilled, the number of completed objectives counts up.
![]()
If you are specifically playing the 1 Hour Challenge, ensure to toggle on the Enable 1Hour Mode Changes to see the 1
Hour specific objectives with their associated point values.